Key takeaways
- CPU and motherboard: The brain and the backbone. Choose a modern Ryzen or Intel chip and a board with the matching socket.
- GPU: The biggest gaming performance driver. An RTX 5060 to 5070 class card, like those in the KOTIN and ZOTAC MEK systems, suits mainstream 1080p and 1440p play.
- RAM and storage: 16GB to 32GB of DDR5 and a 1TB NVMe SSD are the comfortable baseline.
- PSU and case: A quality power supply with headroom and a case with good airflow.
What's inside
Building your first gaming PC feels intimidating, but it is closer to assembling advanced building blocks than to engineering. Every part fits one way, the connectors are keyed so they only go where they belong, and the reward is a machine you understand and can upgrade for years. It also usually stretches your budget further than buying a comparable prebuilt, and it teaches you skills that make future maintenance simple.
This guide walks you through building a gaming PC in 2026, from planning compatible parts to the assembly order and first boot. If building from scratch feels like too much for now, we will also point out solid prebuilt options so you can still get gaming without the wrench work. Either way, you will finish knowing how the pieces fit together.
As an Amazon Associate we earn from qualifying purchases.




⚡ Save on Your Next PC — Amazon Prime
Prime members get fast free shipping on the systems above, plus early access to Prime Day & Black Friday PC deals. New members get a 30-day free trial.
Watch: How to Build a Gaming PC (2026 Beginner’s Guide) — Video Review
Plan and Check Compatibility First
Before buying anything, make sure your parts work together. The CPU must match the motherboard socket, the RAM must be the right type such as DDR5, and the power supply must have enough wattage and the correct connectors for your graphics card. The case must fit your motherboard size and cooler height. Spending an hour confirming compatibility saves days of returns. If you would rather skip this step entirely, a configured system like the KOTIN Prebuilt RTX 5070 or Alienware Aurora comes tested and ready.
Gather Your Core Components
- CPU and motherboard: The brain and the backbone. Choose a modern Ryzen or Intel chip and a board with the matching socket.
- GPU: The biggest gaming performance driver. An RTX 5060 to 5070 class card, like those in the KOTIN and ZOTAC MEK systems, suits mainstream 1080p and 1440p play.
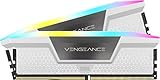
- RAM and storage: 16GB to 32GB of DDR5 and a 1TB NVMe SSD are the comfortable baseline.
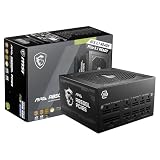
- PSU and case: A quality power supply with headroom and a case with good airflow.
The Assembly Order
Work in a logical sequence to make life easier. Install the CPU, cooler, and RAM onto the motherboard while it sits outside the case, since there is more room to work. Then mount the motherboard in the case, install the power supply, slot in the storage, and finally seat the graphics card. Doing the small, fiddly parts first on an open bench reduces mistakes and awkward angles. Take your time seating the CPU and applying the cooler, as these are the steps beginners most often rush.
Cable Management and Connections
Once the major parts are in, connect the power cables to the motherboard, CPU, and graphics card, then the front-panel headers for power and USB. Route cables behind the motherboard tray where possible so airflow stays clean and the build looks tidy. Double-check that every power connector is fully seated, because a loose 8-pin or 24-pin connector is the most common reason a new build will not boot. Neat cabling is not just cosmetic. It improves cooling and makes future upgrades far easier.
First Boot and Setup
With everything connected, plug in the monitor to the graphics card, not the motherboard, and power on. Enter the BIOS to confirm the system sees your CPU, RAM, and drives, then enable the memory profile so your RAM runs at full speed. From there, install your operating system from a USB drive, load the latest graphics drivers, and run a quick stress test to confirm stable temperatures. If anything fails to appear, power down and recheck connections rather than panicking, since it is almost always a loose cable.
Tips
- Build on a large, well-lit surface and keep the manuals nearby. The motherboard manual shows exactly where each connector goes.
- Plug the monitor into the graphics card, not the motherboard, or you will get no display on first boot.
- Enable your RAM’s XMP or EXPO profile in the BIOS so memory runs at its rated speed instead of a slower default.
- If a build feels beyond you right now, a tested prebuilt is a valid choice and can be upgraded later as you learn.
Frequently Asked Questions
Is it cheaper to build a PC than buy one?
Often, yes, especially at the mid and high end where you avoid assembly markup. The gap has narrowed on budget systems, so compare a planned parts list against a prebuilt before deciding, and factor in the flexibility building gives you.
How long does it take to build a gaming PC?
A first-time builder should set aside two to four hours without rushing, plus time for installing the operating system and drivers. Experienced builders finish faster, but there is no prize for speed on your first attempt.
What if my PC does not turn on?
Do not panic. The usual culprit is a loose power connector or a monitor plugged into the wrong port. Recheck the 24-pin, CPU, and GPU power cables, confirm the RAM is fully seated, and verify the front-panel wiring.
Should I buy a prebuilt instead?
A prebuilt makes sense if you want a tested machine with a warranty and no assembly. Systems like the KOTIN or CyberPowerPC lines get you gaming immediately, and you can still upgrade parts down the road.
Conclusion
Building a gaming PC is a rewarding project that pays off in performance, savings, and knowledge you keep for years. Plan compatible parts, assemble in a sensible order, manage your cables, and take the first boot slowly. And if the DIY route is not for you yet, a quality prebuilt gets you in the game today with room to grow later.