Key takeaways
- For Clip-On Systems: Insert your plastic pry tool or guitar pick into the seam between the ear pad’s plastic base and the headset cup. Gently twist the tool. You will hear a distinct “click” as the first plastic clip releases. Work your way around the perimeter of the cup, releasing the remaining 4 to 6 clips one by one. Do not yank the pad off, as this can snap the male pins on the headset body.
- For Lip/Groove Systems: Grip the outer edge of the old ear pad cushion. Gently pull the pad outward and slightly backward. The flexible fabric collar will slide out of the narrow recessed groove bordering the speaker cup. Slide your finger along the groove to release the rest of the collar.
- For Adhesive Systems: Apply gentle, steady outward pressure to peel the old pad away from the housing. If the adhesive is stubborn, use a hair dryer on low heat for 15 seconds to soften the glue. Be careful not to overheat the internal speaker drivers.
What's inside
A great console gaming headset is an investment in immersive entertainment. Whether you are pinpointing enemy footsteps in a competitive shooter or losing yourself in an expansive open-world RPG, sound isolation and comfort are paramount. However, even the most premium headsets face an inevitable enemy: wear and tear. Over months of intense gaming sessions, sweat, skin oils, and hair products degrade the delicate materials of your ear cushions. Faux leather begins to flake away like black dandruff, memory foam loses its springiness, and lingering odors become impossible to ignore.
If you perform this repair incorrectly, you risk permanently damaging your gear. Brute-forcing a stuck cushion can snap the delicate plastic retention clips molded directly into the headset frame, or worse, puncture the fragile driver diaphragm beneath the grille. Learning how to replace ear pads on console gaming headsets the right way preserves your acoustic seal, saves you from buying an entirely new $100 to $250 device, and restores that “out-of-the-box” plush comfort. As we move into 2026, console hardware continues to push the boundaries of spatial audio, but even the most advanced 3D audio algorithms cannot compensate for flattened, leaky ear cushions that let sound escape.
As an Amazon Associate we earn from qualifying purchases at no extra cost to you. Product prices and availability are accurate as of the date shown and are subject to change.

What You Need
Before beginning, clear a clean, well-lit workspace. You do not need an advanced electronics repair kit, but having the correct tools on hand prevents accidental scratches and broken plastic components.
| Item | Why You Need It | Optional? |
|---|---|---|
| Replacement Ear Pads | Restores the comfort, shape, and acoustic seal of the headset. Must match your specific headset model (typically costing between $8.00 and $25.00). | No |
| Plastic Pry Tool (Spudger) | Safely unclips plastic mounting rings without scratching the headset chassis or tearing the new fabric. | Yes (A guitar pick or old credit card works too) |
| Microfiber Cloth | Wipes away accumulated dust, dead skin cells, and hair from the driver plate. | No |
| 70% Isopropyl Alcohol | Sanitizes the plastic housing and removes old adhesive residue without damaging internal electronics. | Yes (Highly recommended for hygiene) |
| Double-Sided Adhesive Rings | Required only for specific headset models that rely on adhesive mounting rather than clips or grooves. | Model-dependent |
Step-by-Step
Replacing your ear cushions is a highly satisfying 10-to-15-minute project. Because different manufacturers use different attachment mechanisms, we have broken down the process to cover the three most common styles: clip-on systems, rubber lip/groove systems, and adhesive-backed systems.
Step 1: Identify Your Headset’s Attachment Method (Time: 2 minutes)
Examine your replacement ear pads to determine how they attach to the headset. If the replacement pads have a hard plastic ring on the back with small protruding tabs, your headset uses a clip-on system (common on the Sony PlayStation 5 Pulse 3D Wireless Headset). If the replacements have a soft, flexible rubberized flange or collar on the back, your headset uses a lip/groove system (common on the Corsair Void series or Turtle Beach Stealth headsets). If the back is completely flat with a peel-off paper backing, your system relies on adhesive.
Step 2: Remove the Old Ear Pads (Time: 3 minutes)
Work slowly to avoid tearing the delicate speaker mesh underneath.
- For Clip-On Systems: Insert your plastic pry tool or guitar pick into the seam between the ear pad’s plastic base and the headset cup. Gently twist the tool. You will hear a distinct “click” as the first plastic clip releases. Work your way around the perimeter of the cup, releasing the remaining 4 to 6 clips one by one. Do not yank the pad off, as this can snap the male pins on the headset body.
- For Lip/Groove Systems: Grip the outer edge of the old ear pad cushion. Gently pull the pad outward and slightly backward. The flexible fabric collar will slide out of the narrow recessed groove bordering the speaker cup. Slide your finger along the groove to release the rest of the collar.
- For Adhesive Systems: Apply gentle, steady outward pressure to peel the old pad away from the housing. If the adhesive is stubborn, use a hair dryer on low heat for 15 seconds to soften the glue. Be careful not to overheat the internal speaker drivers.
Step 3: Clean the Driver Plate and Housing (Time: 3 minutes)
With the old pads removed, you will likely see a buildup of dust, hair, and skin flakes. Dampen your microfiber cloth with a small amount of 70% isopropyl alcohol—the cloth should be damp, never dripping wet. Wipe down the plastic driver plate, taking care not to push liquid through the protective mesh covering the speaker driver. If you are replacing adhesive-backed pads, use the alcohol-dampened cloth to scrub away any sticky residue left behind on the mounting surface. Let the headset air-dry completely for two minutes.
Step 4: Install the New Ear Pads (Time: 4 minutes)
Now, grab your fresh replacement cushions. Make sure you match the correct pad to the correct side, as many console headsets feature asymmetrical, ergonomic shapes designed to match the natural angle of your ears.
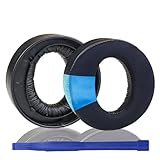
- For Clip-On Systems: Align the plastic tabs on the back of your new cushion with the corresponding slots on the headset cup. For example, if you are using budget-friendly replacement cushions for the Sony PlayStation 5 Pulse 3D Wireless Headset (which feature noise-isolating foam and mesh fabric, retailing around $7.99 to $12.00), align the internal guide pins first. Press down firmly with your thumbs around the perimeter of the cushion until you hear a series of satisfying snaps.
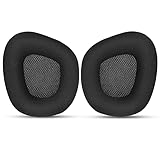
- For Lip/Groove Systems: Stretch one section of the elastic collar over the top edge of the headset’s recessed groove. Hold that section in place with one thumb, and use your other hand to work the rest of the flexible collar into the groove around the entire circle. If you are installing specialized asymmetrical cushions, like those designed for the Corsair Void or Corsair Void PRO RGB series (featuring contoured memory foam and breathable mesh fabric, typically priced around $15.95), ensure the pointed corner of the “D-shape” is oriented toward the back of the headset before stretching the collar into place.
- For Adhesive Systems: Peel off the protective paper backing from the new cushion. Carefully align the pad with the outer edge of the ear cup, making sure not to block any microphone ports or charging jacks. Press and hold the cushion firmly against the headset housing for 30 to 45 seconds to establish a strong bond.
Step 5: Perform a Fit and Sound Test (Time: 2 minutes)
Put the headset on your head. It should feel balanced, with equal clamping force around both ears. Shake your head gently; the pads should not shift, creak, or rattle. Play a familiar game or audio track on your console. If you notice a loss of bass response or can hear ambient room noise that was previously blocked, check the perimeter of the ear cups to ensure the pads are completely sealed and snapped securely into place.
Mistakes to Avoid
- Using Metal Tools: Never use flathead metal screwdrivers or butter knives to pry off ear pads. One slip can gouge the plastic housing or puncture the delicate driver diaphragm, permanently ruining the headset’s acoustics.
- Ignoring Left/Right Orientation: Many modern console headsets feature angled ear cups designed to mimic the natural anatomy of the human head. Installing an ear pad backward or upside down will create gaps near your jawline, destroying bass response and causing uncomfortable hot spots.
- Pulling Too Hard on Delicate Wires: On some headset designs, the internal speaker wires run close to the retention frame. Always pry outward, away from the center of the cup, to avoid snagging internal electrical connections.
- Neglecting the Cleaning Step: Installing new cushions over old, crumbling foam debris or sticky adhesive residue prevents the new pads from seating flush, which compromises the acoustic seal.
How Often to Replace Ear Pads
The lifespan of your ear pads depends heavily on your gaming habits, local climate, and skin chemistry. Active gamers who play 15 to 20 hours a week will typically need to replace their ear cushions every 12 to 18 months. If you game in a warm environment without air conditioning, sweat will accelerate the breakdown of polyurethane (faux leather) coatings, shortening that window to 6 to 9 months.
Inspect your pads monthly. It is time for a replacement if you notice the outer fabric flaking, the inner memory foam failing to spring back after being compressed, or a noticeable reduction in passive noise isolation during gameplay.
When to Call a Pro or Replace the Headset
While changing ear pads is a simple DIY task, there are times when a simple pad swap won’t solve your issues. If your headset is experiencing any of the following problems, it is time to retire the unit and upgrade rather than spending money on new cushions:
- The internal battery holds less than 2 hours of charge.
- The audio crackles, cuts out when you wiggle the cord, or drops connection constantly.
- The plastic headband is cracked or structurally compromised.
- The microphone fails to pick up your voice clearly, or the mute switch is broken.
FAQ
Will aftermarket ear pads change the sound profile of my headset?
Yes, the material of your ear pads directly impacts how sound waves behave. Protein leather pads seal in air, boosting low-end bass frequencies and maximizing passive noise isolation. Mesh fabric and velour pads allow more airflow, which keeps your ears cooler but can slightly reduce bass punch and let in more ambient room noise.
Can I wash my old ear pads instead of buying new ones?
You can hand-wash mesh fabric ear pads with mild dish soap and warm water, but you must let them air-dry completely for 24 to 48 hours before reinstalling them. However, if the internal foam has collapsed or the faux leather coating has begun to peel and crack, washing will not restore them; replacement is the only option.
How do I know what size replacement pads to buy?
The safest route is to search for replacement pads specified for your exact brand and model of headset. If you have an unbranded or rare headset, measure the outer diameter of the ear cup with a ruler. Most round cushions range from 80mm to 110mm in diameter, while oval cushions require matching both the height and width measurements.
Why do my ears touch the plastic inside the headset after replacing the pads?
If your ears are pressing against the hard plastic driver plate, your replacement pads are likely too thin or made of low-density foam that compresses too easily under the headset’s clamping force. Look for replacement cushions that feature high-density memory foam or “cooling gel” layers, which maintain their structural depth (usually around 20mm to 25mm of thickness) even during long gaming sessions.