Key takeaways
- Choose Mint or Bazzite if this is your first Linux install.
- Choose Fedora or a rolling release only if you want the newest drivers and accept more maintenance.
- Match the distro to your GPU: AMD is the smoothest, NVIDIA works well with the bundled proprietary driver.
What's inside
- Watch: How To Install Linux For Gaming — Video Review
- Step 1: Pick the Right Distribution
- Step 2: Create Your Bootable USB
- Step 3: Run the Installer and Set Up Drivers
- Step 4: Install Steam, Proton, and Your Games
- Step 5: Learn the Basics and Keep It Healthy
- Related Guides
- Frequently Asked Questions
- Conclusion
- Related Articles
- Related Guides
Installing Linux for gaming used to mean a weekend of forum posts and driver headaches. In 2026 the process is closer to setting up a console: pick a beginner-friendly distribution, write it to a USB stick, and follow a short guided installer. Within an hour you can be launching Steam and playing.
- Watch: How To Install Linux For Gaming — Video Review
- Step 1: Pick the Right Distribution
- Step 2: Create Your Bootable USB
- Step 3: Run the Installer and Set Up Drivers
- Step 4: Install Steam, Proton, and Your Games
- Step 5: Learn the Basics and Keep It Healthy
- Related Guides
- Frequently Asked Questions
- Conclusion
- Related Articles
- Related Guides
This guide walks you through the whole journey, from choosing your distro to getting Proton and controllers working. We lean on trusted, beginner-focused resources so you always have a reference at your elbow if a step looks unfamiliar.
As an Amazon Associate we earn from qualifying purchases.


⚡ Save on Your Next PC — Amazon Prime
Prime members get fast free shipping on the systems above, plus early access to Prime Day & Black Friday PC deals. New members get a 30-day free trial.
Watch: How To Install Linux For Gaming — Video Review
Step 1: Pick the Right Distribution
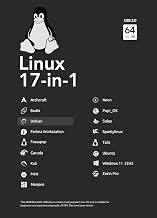
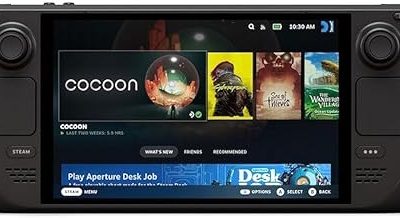
Your first decision shapes everything after it. Newcomers switching from Windows are best served by Linux Mint 22.3, and a resource like Linux Mint Made Simple for Beginners or Linux Mint Cinnamon for Windows Users keeps the transition calm. If you want a console-style, gaming-first system, the Bazzite Linux Guide covers an immutable distro built specifically for play.
- Choose Mint or Bazzite if this is your first Linux install.
- Choose Fedora or a rolling release only if you want the newest drivers and accept more maintenance.
- Match the distro to your GPU: AMD is the smoothest, NVIDIA works well with the bundled proprietary driver.
Step 2: Create Your Bootable USB
Download the ISO for your chosen distro and write it to an 8GB or larger USB drive using a tool like Balena Etcher or Rufus. Boot your PC from the stick to enter a live session, where you can test drivers, Wi-Fi, and audio before touching your hard drive. Nothing is written to disk until you click install, so you can back out at any point.
Step 3: Run the Installer and Set Up Drivers
The guided installer handles partitioning, timezone, and user setup in a few clicks. Choose to install alongside Windows for dual boot, or wipe the drive for a dedicated Linux machine. After the first reboot, open the Driver Manager, enable any recommended GPU driver, and run a full system update so you start on the latest Mesa or NVIDIA build.
Step 4: Install Steam, Proton, and Your Games
Install Steam from your distro’s software center, then in Steam Settings enable Steam Play for all titles to activate Proton. This compatibility layer runs most Windows games directly. Check ProtonDB for per-game tips, plug in an Xbox or PlayStation controller, and confirm it is detected before a long session.
Step 5: Learn the Basics and Keep It Healthy
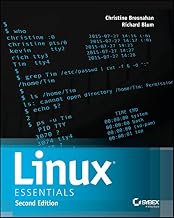
You do not need to be a terminal wizard, but a little knowledge pays off. Books such as How Linux Works, 3rd Edition and Linux for Beginners explain updates, permissions, and troubleshooting so a small problem never becomes a reinstall. Schedule regular updates and keep a recovery USB handy.
Frequently Asked Questions
Do I have to remove Windows to game on Linux?
No. Dual booting lets you keep Windows and choose Linux at startup. Many gamers run both for a while, then switch fully once they trust their Linux setup with the titles they play most.
How long does the whole installation take?
Writing the USB takes a few minutes, and the guided installer usually finishes in fifteen to thirty minutes. Add driver updates and Steam setup, and most people are gaming within an hour.
Will my game controllers work automatically?
Xbox and PlayStation controllers are recognized natively on modern distros, and Steam Input handles the rest. Wireless dongles and Bluetooth pads work too, though you may need to pair Bluetooth devices once through the settings panel.
What if a game will not launch?
Check ProtonDB for that title, try a different Proton version in the game’s compatibility settings, and make sure your drivers are current. A beginner reference book is invaluable for the rare command-line fix.
Conclusion
Installing Linux for gaming in 2026 is a straightforward, low-risk project: choose a beginner distro, boot from USB, run the installer, and enable Proton. Keep a good beginner’s guide nearby for confidence, and you will trade Windows overhead for a fast, tidy, open-source gaming system without giving up your library.