Key takeaways
- Launch the NVIDIA Control Panel (right-click on your desktop and select it).
- Navigate to the “Display” section and select “Set up G-SYNC.”
- You’ll see an option to “Enable G-SYNC, G-SYNC Compatible.” Check this box.
- Below this, you can choose to enable it for full screen mode or windowed and full screen mode. For gaming, enabling it for both is usually ideal.
- Click “Apply” to save your settings.
- If you don’t see the G-Sync option, ensure your monitor is connected via DisplayPort and that you’ve selected the correct input on your monitor itself.
What's inside
- Watch: How to Enable G-Sync or FreeSync — Video Review
- Understanding Adaptive Sync: G-Sync vs. FreeSync
- Checking Compatibility: The First Crucial Step
- Enabling G-Sync via NVIDIA Control Panel
- Enabling FreeSync via AMD Radeon Software
- Monitor On-Screen Display (OSD) Settings
- Tips for Optimal Performance
- Frequently Asked Questions
- Conclusion
- Related Articles
Tearing, stuttering, and input lag can be frustrating distractions that pull you out of the immersive gaming experience you crave. Fortunately, adaptive sync technologies like NVIDIA G-Sync and AMD FreeSync are here to help. These features dynamically adjust your monitor’s refresh rate to match the frame rate output of your graphics card, resulting in smoother, more fluid gameplay. If you’ve recently invested in a compatible monitor and GPU, this guide will walk you through enabling G-Sync or FreeSync to unlock a superior gaming visual experience.
- Watch: How to Enable G-Sync or FreeSync — Video Review
- Understanding Adaptive Sync: G-Sync vs. FreeSync
- Checking Compatibility: The First Crucial Step
- Enabling G-Sync via NVIDIA Control Panel
- Enabling FreeSync via AMD Radeon Software
- Monitor On-Screen Display (OSD) Settings
- Tips for Optimal Performance
- Frequently Asked Questions
- Conclusion
- Related Articles
Whether you’re rocking an NVIDIA GeForce or an AMD Radeon graphics card, the setup process is straightforward. We’ll cover the essential steps, from checking compatibility to configuring settings in your GPU’s control panel and your monitor’s on-screen display.
As an Amazon Associate we earn from qualifying purchases.


⚡ Save on Your Next PC — Amazon Prime
Prime members get fast free shipping on the systems above, plus early access to Prime Day & Black Friday PC deals. New members get a 30-day free trial.
Watch: How to Enable G-Sync or FreeSync — Video Review
Understanding Adaptive Sync: G-Sync vs. FreeSync
Before we dive into the setup, it’s important to understand what these technologies do. G-Sync, developed by NVIDIA, and FreeSync, an open standard by AMD, both aim to solve the same problem: screen tearing. Screen tearing occurs when your GPU outputs frames at a different rate than your monitor’s refresh rate, causing parts of multiple frames to be displayed simultaneously, creating a “torn” image. Adaptive sync technologies synchronize these rates, ensuring that a new frame is only displayed when it’s ready, eliminating tearing and reducing stuttering and input lag. While both achieve similar results, G-Sync monitors often require a dedicated hardware module, leading to a higher price point. Many modern FreeSync monitors are also “G-Sync Compatible,” meaning they can work with NVIDIA GPUs, expanding your options.
Checking Compatibility: The First Crucial Step
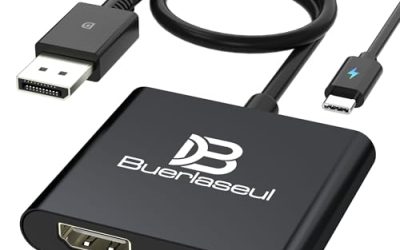
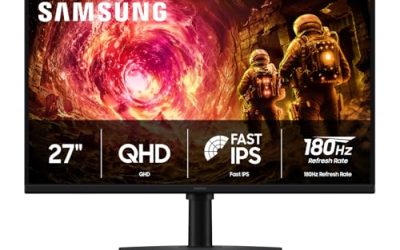
The most critical step is ensuring your hardware is compatible. For G-Sync, you’ll need an NVIDIA GeForce graphics card (GTX 10-series or newer) and a G-Sync or G-Sync Compatible monitor. AMD FreeSync is designed for AMD Radeon graphics cards (Radeon HD 4000 series or newer) and FreeSync-certified monitors. However, as mentioned, many FreeSync monitors work with NVIDIA GPUs via the G-Sync Compatibility program. To check if your monitor is G-Sync Compatible, visit NVIDIA’s official website. For FreeSync, consult your monitor’s specifications or AMD’s website. Also, ensure you’re using the correct display cable. For high refresh rates and resolutions like those found on the Samsung 27” Odyssey OLED G5 or the ASUS TUF Gaming Series 5 24.5” 1080P Monitor, a DisplayPort cable is generally recommended. For instance, a Capshi 8K 4K DisplayPort Cable 1.4 supports high bandwidths necessary for these features.
Enabling G-Sync via NVIDIA Control Panel
Once you’ve confirmed compatibility, enabling G-Sync is done through the NVIDIA Control Panel.
- Launch the NVIDIA Control Panel (right-click on your desktop and select it).
- Navigate to the “Display” section and select “Set up G-SYNC.”
- You’ll see an option to “Enable G-SYNC, G-SYNC Compatible.” Check this box.
- Below this, you can choose to enable it for full screen mode or windowed and full screen mode. For gaming, enabling it for both is usually ideal.
- Click “Apply” to save your settings.
- If you don’t see the G-Sync option, ensure your monitor is connected via DisplayPort and that you’ve selected the correct input on your monitor itself.
Some monitors, like the CUNPU 24 Inch 1080P 200Hz Gaming Monitor, might require you to enable a specific “Game Mode” or “Overdrive” setting in their own OSD menu for optimal adaptive sync performance.
Enabling FreeSync via AMD Radeon Software
For AMD users, enabling FreeSync is done through the AMD Radeon Software.
- Open the AMD Radeon Software (right-click on your desktop and select it).
- Go to the “Gaming” tab, then select “Display.”
- You should see an option for “AMD FreeSync.” Ensure it’s toggled to “Enabled.”
- Similar to G-Sync, you might have options for “Full screen” or “Windowed and Full screen.” Choose the setting that best suits your needs.
- Click the gear icon in the top right to access further settings, and ensure “Radeon Anti-Lag” is also enabled for reduced input lag.
- If you’re using an NVIDIA GPU with a FreeSync monitor and it’s listed as G-Sync Compatible, you’ll follow the NVIDIA Control Panel steps above.
- For monitors like the INNOCN 24.5″ 1440P 240Hz Gaming Monitor, it’s always a good idea to check its on-screen display (OSD) for any specific adaptive sync or gaming enhancement settings.
Monitor On-Screen Display (OSD) Settings
While the GPU control panels handle the core adaptive sync activation, your monitor’s own settings can also play a role. Many gaming monitors, including the ASUS TUF Gaming Series 5 24.5” 1080P Monitor and others, have an On-Screen Display (OSD) menu accessible via buttons on the monitor itself. Within this menu, look for settings related to:
- Adaptive Sync/VRR: Ensure this is enabled.
- Response Time/Overdrive: Setting this too high can cause inverse ghosting, while too low can result in smearing. Experiment with different levels, often “Normal” or “Fast” strikes a good balance.
- Game Mode: Some monitors have pre-set modes optimized for gaming that might automatically enable or enhance adaptive sync features.
- Input Lag Reduction: Look for any specific settings that aim to minimize input lag.
Consult your monitor’s manual for specific instructions on navigating its OSD.
Tips for Optimal Performance
- Update Your Drivers: Always ensure you have the latest graphics drivers installed for both NVIDIA and AMD.
- Use DisplayPort: For G-Sync and FreeSync to function correctly at higher resolutions and refresh rates, a DisplayPort connection is almost always required. Ensure your cable, like the Capshi 8K 4K DisplayPort Cable 1.4, supports the necessary bandwidth.
- Disable V-Sync in Game: Once G-Sync or FreeSync is enabled, you should generally disable V-Sync within your game’s graphics settings. V-Sync can introduce input lag and, when combined with adaptive sync, can sometimes lead to issues. Let your GPU driver manage V-Sync if needed (NVIDIA offers a “Fast Sync” option as an alternative).
- Test in Games: The best way to confirm it’s working is to load up your favorite games. Look for visual improvements like the absence of tearing. Some games have built-in benchmarks or visualizers that can help confirm adaptive sync is active.
Frequently Asked Questions
What if I don’t see the G-Sync or FreeSync option?
Ensure your graphics card and monitor are compatible. For G-Sync, check that you’re using a DisplayPort cable and have the latest NVIDIA drivers installed. For FreeSync, verify you’re using a compatible AMD GPU and have the latest AMD drivers. Also, check your monitor’s OSD to ensure adaptive sync is enabled there.
Can I use G-Sync with an AMD graphics card or FreeSync with an NVIDIA graphics card?
Generally, no. G-Sync requires an NVIDIA GPU, and FreeSync requires an AMD GPU. However, many FreeSync monitors are “G-Sync Compatible,” meaning they can work with NVIDIA GPUs. In such cases, you’d enable it via the NVIDIA Control Panel.
Does enabling G-Sync or FreeSync impact performance?
The primary goal of these technologies is to improve visual smoothness, not to decrease performance. In fact, by reducing stuttering and tearing, they can make games feel more responsive. You might see a slight increase in input lag compared to running with V-Sync off and tearing, but it’s usually significantly less than traditional V-Sync.
My monitor supports both G-Sync and FreeSync. Which should I enable?
If you have an NVIDIA GPU, you’ll use the G-Sync settings in the NVIDIA Control Panel. If your monitor is G-Sync Compatible, it will work. If you have an AMD GPU, you’ll use the FreeSync settings in the AMD Radeon Software. You can’t enable both simultaneously for the same display.
Conclusion
Enabling G-Sync or FreeSync is a game-changing upgrade for any PC gamer. By synchronizing your GPU and monitor, you eliminate visual distractions and enjoy a smoother, more responsive gaming experience. Follow these steps carefully, and you’ll be well on your way to enjoying tear-free gaming on your compatible hardware. Remember to always keep your drivers updated and experiment with monitor settings for the best possible results.