Key takeaways
- Mark the routes first: Identify stairs, edges, gates, and changes in level. Those are the places where light contributes most to safe movement.
- Mock up the spacing: Place temporary lights where you plan to install them and view the deck from standing and seated positions. Move them if the beam produces glare or leaves a dark patch.
- Use a practical starting interval: For small shielded step lights, begin with one per step or landing, then adjust for the beam angle and stair width. Along a deck edge, try about 4–6 feet between low-output fixtures as an initial layout, not a fixed rule.
- Separate ambient and task lighting: Put brighter lights near cooking or dining areas and softer lights around the perimeter. Separate switches or dimming make the setup more flexible.
- Plan cable routes before drilling: Check the framing, drainage, and access for future maintenance. Use outdoor-rated components and seal penetrations with materials suited to the deck and fixture.
Best LED Deck Lights for Outdoor Spaces
The best LED deck lights depend on where you need light: use low-voltage recessed fixtures for clean, even illumination on steps and deck edges, solar lights where wiring is impractical, and adjustable wall or post lights when you need brighter task lighting. Before choosing, compare brightness, color temperature, power, weather protection, installation requirements, and the area each fixture can cover.
Choose by deck layout, not by the brightest number
A bright light can still leave dark patches if it is aimed poorly or spaced too far from the next fixture. For safe movement, prioritize visible steps, changes in level, and the deck perimeter. For dining or cooking, add a separate, brighter layer rather than making every recessed light harsh.
Our top picks


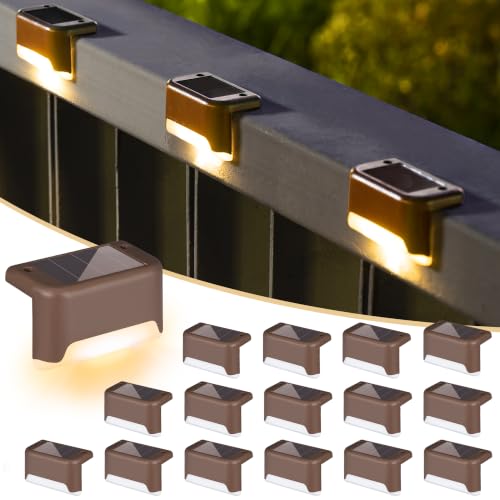

As an Amazon Associate we earn from qualifying purchases at no extra cost to you. Ratings are shown as listed on Amazon.
| Deck situation | Good starting choice | Planning target | Main trade-off |
|---|---|---|---|
| Stairs and edges | Shielded recessed or surface-mounted low-voltage lights | About 10–30 lumens per fixture; one at each step or landing as needed | More fixtures and careful placement are usually better than a few high-output points |
| Small seating deck | Low-voltage edge lights plus one or two wall or post lights | Roughly 100–300 lumens of ambient output per 100 sq. ft., adjusted for layout | Open fixtures can cause glare when seated |
| Dining or food-prep area | Directional wall, pergola, or post lighting | About 300–700 lumens at the task area | May need separate switching or dimming to avoid overlighting the whole deck |
| No convenient outdoor wiring | Solar fixtures for accent and route marking | Choose by stated output and runtime, then allow extra fixtures for shaded areas | Output and operating time depend on sun exposure and season |
These figures are planning ranges, not guarantees of a particular brightness on the boards. Beam angle, mounting height, fixture shielding, surface color, and spacing all affect the result. Treat manufacturer coverage claims as a starting point, then mock up positions with temporary lights after dark.
Brightness and color: what works outdoors
For a deck, lumens are more useful than watts when comparing brightness. Watts describe electricity use; lumens describe light output. Small step or edge fixtures often need only 10–30 lumens because their job is to reveal an obstacle, not light the whole deck. A wall-mounted light over a table may need several hundred lumens, ideally with a diffuser or downward shield to keep it out of people’s eyes.
Color temperature is measured in kelvins. Around 2700K gives a warm, relaxed appearance and tends to suit wood and evening seating. Around 3000K looks a little cleaner while remaining warm. Consider 3500–4000K only where seeing detail matters more than a cozy feel, such as a work or cooking area. If you mix fixture types, keep their color temperatures close so the deck does not look patchy.
Dimming is useful when a space serves more than one purpose. Check that the LED driver and dimmer are explicitly compatible; an incompatible combination can flicker, buzz, or fail to dim smoothly.
Power options: low voltage, line voltage, or solar?
Low-voltage systems
For many decks, 12V low-voltage lighting offers a practical balance of safety, fixture choice, and predictable operation. It requires a compatible transformer and outdoor-rated cable. Keep the transformer accessible and size it for the total connected load, with some spare capacity. Long wire runs can cause voltage drop, so follow the system maker’s cable and layout guidance rather than assuming one thin cable will serve every fixture.
Line-voltage fixtures
Mains-powered fixtures can suit a wall, ceiling, or covered outdoor area when the location already has suitable wiring. Installation and protection requirements are stricter: use fixtures rated for the exposure and have a qualified electrician handle new or altered line-voltage wiring. Do not treat a low-voltage landscape transformer as a substitute for proper mains installation.
Solar lights
Solar is the easiest option where trenching or cable routing would be disruptive. It is also the least predictable: a panel shaded by a railing, roof, or trees may not recharge the battery enough for a full evening. Look for replaceable batteries where possible, a stated operating time, and a panel that can be positioned in direct sun. Use solar for path marking and accent lighting rather than relying on it as the only source over stairs or a busy dining area.
Worked low-voltage power check
Suppose a layout uses eight 2W step lights and four 3W post lights. The total load is (8 × 2W) + (4 × 3W) = 28W. Allowing 25% spare capacity gives 28W × 1.25 = 35W, so a transformer rated at least 35W is a reasonable starting point, provided it supports the fixtures’ voltage and load type. Check cable-run limits and the transformer manufacturer’s instructions too; wattage alone does not account for voltage drop or compatibility.
Weather ratings and materials
Check the fixture’s IP rating and installation location. The first digit concerns solids and dust; the second concerns water. For an exposed deck, IP65 is a useful target for fixtures that may receive water jets or wind-driven rain. IP44 can be suitable in more sheltered positions, but it is not a universal choice for an exposed, ground-level, or frequently splashed location. Confirm the product is rated for the exact exposure, including any in-ground use.
Choose corrosion-resistant housings and fasteners, particularly near salt air or pools. Stainless steel or suitable coated metals generally hold up better than untreated steel. A high IP rating does not by itself guarantee resistance to corrosion, UV exposure, or standing water, so check those details separately.
Installation and coverage: avoid dark gaps and glare
- Mark the routes first: Identify stairs, edges, gates, and changes in level. Those are the places where light contributes most to safe movement.
- Mock up the spacing: Place temporary lights where you plan to install them and view the deck from standing and seated positions. Move them if the beam produces glare or leaves a dark patch.
- Use a practical starting interval: For small shielded step lights, begin with one per step or landing, then adjust for the beam angle and stair width. Along a deck edge, try about 4–6 feet between low-output fixtures as an initial layout, not a fixed rule.
- Separate ambient and task lighting: Put brighter lights near cooking or dining areas and softer lights around the perimeter. Separate switches or dimming make the setup more flexible.
- Plan cable routes before drilling: Check the framing, drainage, and access for future maintenance. Use outdoor-rated components and seal penetrations with materials suited to the deck and fixture.
Recessed fixtures create a neat profile but may require cutting boards and access for wiring or replacement. Surface-mounted lights avoid larger cutouts and are often simpler to service, though they can catch on furniture or become a visual distraction. For stairs, position the light so it illuminates the tread and riser without shining directly toward someone walking up or down.
Quick decision guide
| If your priority is… | Choose… | Check before buying |
|---|---|---|
| A tidy, permanent layout | Recessed low-voltage LED fixtures | Cutout size, transformer compatibility, replacement access |
| Simple retrofit without cutting boards | Surface-mounted low-voltage fixtures | Mounting height, cable protection, trip or snag risk |
| No practical cable route | Solar accent or step lights | Direct-sun exposure, battery replacement, seasonal runtime |
| Dining or task visibility | Shielded wall, post, or overhead lighting | Beam direction, dimming compatibility, suitable weather rating |
Bottom line
For most wired decks, a low-voltage system with warm-white, shielded fixtures is a versatile starting point: use modest-output lights for steps and borders, then add brighter adjustable lighting where people eat or work. Choose solar when wiring is impractical, but account for shade and shorter winter charging. The most reliable layout comes from matching fixtures to specific zones, checking weather and electrical compatibility, and testing spacing before making permanent cuts.